Guitar Effects Chain Order: Optimize Your Sound with the Perfect Setup
In my experience, shaping the tone of a guitar can be likened to the artistry of painting. Here, the effects pedals are the unique colors on a palette.
Each guitarist has their preferred order for these pedals. This order affects the overall sound in subtle yet profound ways. My signal chain, for instance, follows a philosophy that prioritizes dynamics and clarity.
It’s about understanding the interplay between different effects. It’s also about how their order can significantly change the character of the sound.

Crafting the perfect guitar effects chain order is a journey in itself. Starting with tuning, I move on to dynamic effects like compressors. Then, I continue through the pitch-altering effects and overdrive and distortion. Modulation and time-based effects often find their place at the end of my chain.
Conventional wisdom suggests certain orders for pedals, but I always encourage experimentation. After all, discovering a unique sound sometimes requires breaking away from the usual paths and trying unconventional signal chains.
Key Points
- Guitar signal chain order greatly influences the final guitar tone.
- Conventional wisdom for pedal arrangement serves as a guideline, not a rule.
- Experimenting with pedal order can lead to unique and personalized sounds.
Table of Contents
Signal Chain Basics You Need To Know
The signal chain in guitar setups is the journey from your guitar strings through various effects and eventually to your amplifier. Getting the volume and gain right, along with the placement of dynamic effects, is crucial for shaping your sound effectively.
The Role of Volume and Gain
I understand that manipulating volume and gain is foundational in the signal chain. Volume controls how loud my overall signal is, while gain determines the amount of signal boost. It often leads to overdrive or distortion if pushed beyond the clean signal threshold.
It’s essential to balance these two to maintain the integrity of my input signal without unwanted noise or loss of tone clarity. Here’s a basic breakdown of the relationship between volume and gain:
- Volume: Controls the loudness of the sound output.
- Gain: Boosts the signal, driving the amp harder which can introduce distortion.
Managing volume and gain is the first step in signal processing. It sets the stage for how other effects will interact with my sound.
Dynamic Effects Placement
The placement of dynamic effects like compressors and noise gates within my signal chain deeply affects my tone. A compressor, for example, smooths out the dynamics of my playing. It evens the levels by reducing the gain of louder notes and boosting quiet ones, which increases the overall sustain.
I typically place a compressor early in the chain, right after my tuner, to work with the cleanest signal possible.
A noise gate is another dynamic tool. It’s designed to eliminate unwanted noise by silencing the signal when it falls below a certain threshold. This tool is particularly useful if I’m using high-gain effects that can introduce hiss or hum into my signal path.
Here’s how I might arrange my dynamic effects:
- Compressor: To maximize sustain and even out my playing dynamics.
- Boost Pedal: To lift my signal before it hits other effects, giving me more control over their response.
- Noise Gate: To minimize noise, especially when gain effects are used, ensuring a clean processed signal.
By thoughtfully placing these effects, I can maintain control over the dynamics and cleanliness of my sound before it’s further sculpted by modulation or time-based effects.
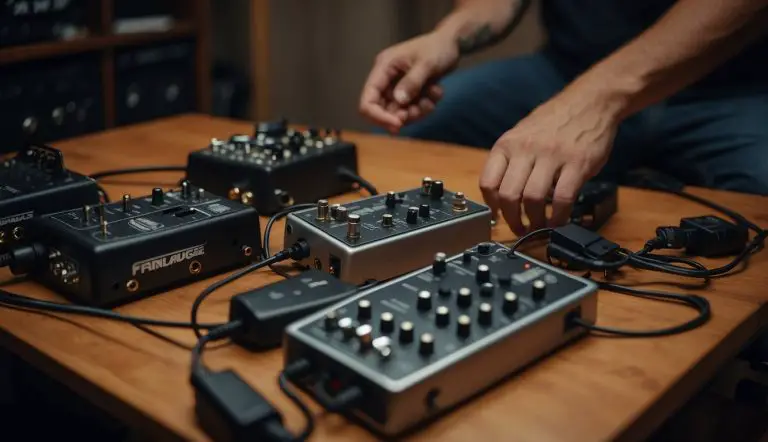
How to Set Up Guitar Effects Pedals
When I approach setting up my guitar effects pedals, I like to ensure that I’m putting them in an order that optimizes my sound. Here’s a simple guide I follow:
1. Dynamics and Filters:
First, I place my compressors, limiters, and EQ pedals at the start. It’s crucial because they shape the raw signal of my guitar, ensuring that the effects that follow work on a consistent signal.
- Compressors/Limiters: Helps even out the dynamic range.
- EQ Pedals: Adjust frequency response to taste.
2. Gain-Based Effects:
Next, I include distortion, overdrive, and fuzz pedals. Placing them after the dynamic effects allows me to have a clean distortion sound without unwanted noise.
- Overdrive/Distortion/Fuzz: Gives character and grit to my tone.
3. Modulation:
Chorus, flanger, and phaser pedals come next. These modulation effects benefit from having a more distorted signal to work with.
- Chorus/Flanger/Phaser: Adds depth and movement to my sound.
4. Time-Based Effects:
Finally, delay and reverb pedals come at the very end. They are designed to replicate space, and if they’re earlier in the chain, they can muddy up the other effects.
- Delay/Reverb: Creates echoes and simulates acoustic spaces.
I always test and tweak the setup as sometimes rules are made to be broken. It’s all about finding what sounds best for my style and gear.
Exploring Core Effects Types

When crafting your guitar tone, the effects chain order can significantly shape your sound. Here, I’ll break down the essential effects types and explain how they impact your overall tone.
Gain-Driven Effects
Overdrive, Distortion, and Fuzz are mainstays in the world of gain-driven effects. These pedals amplify the signal to the point of clipping, each offering a unique flavor of harmonic richness:
- Overdrive: I use overdrive to warm up my sound, adding a touch of dynamics and a slight edge that’s perfect for blues or rock. It simulates the natural breakup of an overdriven tube amp.
- Distortion: For heavier music genres, distortion is my go-to. It provides a sustained, aggressive tone that carries solos and power chords with authority.
- Fuzz: When I want a bold, buzzy texture, fuzz is the effect I reach for. It squashes the signal into a square wave, giving me a vintage-sounding vibe akin to 60s rock.
Modulation and Pitch Effects
Moving into the realm of space and dimension, modulation effects like Chorus, Phaser, Flangers, Tremolo, and Vibrato play with the frequency and amplitude aspects of my sound:
- Chorus: By splitting the guitar signal and slightly detuning one path, chorus adds a shimmering character to my playing. This makes it sound as if multiple guitars are playing in unison.
- Phaser: It feels like my sound is taking a spin when I apply a phaser. It cyclically alters the phase of my signal, creating a sweeping effect that’s great for funk and psychedelic genres.
- Flangers: Similar to phasers but with a more pronounced effect, flangers create a jet-like whoosh that brings a dramatic sense of motion.
- Tremolo and Vibrato: If I want to modulate volume or pitch a bit more subtly, I use tremolo for a rhythmic pulsation and vibrato for a wavering pitch effect.
Lastly, when I’m looking to add harmonic complexity or reach notes that are outside the normal range of my guitar, Pitch Shifter and Harmonizer pedals can be very impactful. A pitch shifter can drop or raise my pitch by set intervals, while a harmonizer adds musically related pitches to create harmony lines. These can be used to create everything from a thickened sound to otherworldly textures.
Perfecting the Effect Order
When I craft my guitar effects chain, I find it critical to place pedals in an order that maximizes the tone and responsiveness of each effect. Deciding where to place time-based and ambient effects, as well as making appropriate use of the effects loop, can make a world of difference in the quality of the resulting sound.
Time-Based and Ambient Effects
I always pay special attention to my time-based effects like delay and reverb. Their placement can drastically alter the texture and space of the sound.
Generally, I place reverb pedals near the end of the signal chain to allow the reverberation to encompass all the modified sounds. When it comes to delays, I prefer to position them before the reverb so that the echoes are properly diffused, creating a more natural echo effect.
Here’s my typical setup:
- Tuner
- Wah Pedal
- Fuzz Pedal
- Overdrive and Distortion Pedals
- Volume Pedal (sometimes I place it after the wah for more precise volume control, depending on the gig)
- EQ Pedal (to shape the tone after distortion)
- Modulation Effects (like chorus and flanger)
- Delay
- Reverb
Utilizing the Effects Loop
My amp’s effects loop is a handy feature. It allows me to route certain pedals through it, mostly time-based effects. This way, they process the sound after my amp’s preamp stage.
It tends to provide a clearer, more defined effect. This is by avoiding the muddiness that sometimes occurs when too many effects hit the preamp at once.
I recommend using the effects loop for delays and reverbs. This helps maintain their clarity and prevent them from becoming overpowering.
Here’s how I usually set it up:
- Preamp Section:
- Gain effects like overdrive or distortion are placed before the amp’s preamp.
- Effects Loop:
- The loop starts with a Volume Pedal for overall control.
- I continue with the EQ Pedal, adjusting the frequencies post-preamp.
- Next comes any Modulation Effects.
- Lastly, is the Delay followed by the Reverb for a spacious ambience.
Advanced Concepts and Experimentation
As a guitarist, I understand that exploring the frontier of tone involves more than just stacking pedals in the typical order. It’s about manipulating signal chains to carve out unique sounds using advanced concepts and a willingness to experiment.
Signal Quality and Buffers
My signal’s integrity is paramount. To preserve it, I pay close attention to my use of buffers.
Buffers are crucial in counteracting the tone suck caused by long cables and multiple pedals. These can drain the treble and frequencies from my signal, resulting in a loss of clarity.
Using a buffered bypass can help maintain the signal quality, especially when I use many true bypass pedals.
The key is to strategically place buffers in my chain to optimize tone quality. For example, placing one at the beginning to drive the signal through the chain with minimal degradation.
Pedal Placement and Types:
- Tuner pedals: At the chain’s start, they efficiently use the cleanest signal.
- Buffer: Deploy near the start or right after a true bypass pedal can prevent signal loss.
- Filter and boost pedals: Given their impact on signal dynamics, they’re typically up front.
Creative Pedal Placement and Types
Experimentation leads to discovery. I don’t always follow the typical pedal sequence. Instead, I apply creative techniques, like placing a filter pedal before a distortion to manipulate the harmonics or a boost pedal post-distortion for a volume lift without altering my drive’s character.
I’ve also tried unusual placements, like an octave pedal after a rotary speaker effect. This gives me those organ-like tones with an added layer of pitch variation.
Even the position of technology like pitch-shifting can define whether I get subtle harmony shifts or pronounced synthesized sounds.
Experimentation Examples:
- Boost Pedal: Behind distortion for volume, or before for added gain.
- Filter Pedal: Before distortion for tone shaping; after for specific frequency effects.
- Octave Pedals: Unique placements can yield unpredictable but musical results.
Frequently Asked Questions
In this section, I’ll answer some common inquiries about assembling a guitar pedalboard, from essential pedals to specific arrangements for different guitar styles.
What essential pedals should I include on my pedalboard?
For a versatile pedalboard, I recommend including a tuner, overdrive, delay, and reverb pedals. These cover basic needs for most guitar players.
Can you suggest the best setup for a guitar pedal board?
The best setup often starts with dynamics pedals like compressors, followed by filter effects such as wah-wahs, then drive pedals like overdrive or distortion.
Modulation effects such as chorus and phasers usually come next, with time-based effects like delays and reverbs at the end.
Could you provide a diagram that shows the typical order of guitar pedals?
While I can’t provide diagrams here, a common order is to place dynamic effects first, followed by drive, then modulation, and finally time-based effects. Imagine a line that goes from your guitar through each effect and ends at your amplifier.
Where can I find a PDF guide for setting up my guitar effects chain?
One effective way to find a PDF guide is to search online for guitar forums and manufacturer websites. Companies like Boss and MXR often provide guides for setting up pedalboards.
How do I incorporate an effects loop into my pedal order?
If your amplifier has an effects loop, place your modulation and time-based effects within the loop. This setup keeps the driven amp sound from muddying up the effects that typically work best with a cleaner signal.
What’s the recommended way to arrange pedals for an acoustic guitar?
For acoustic guitar, I would arrange the pedals to enhance the natural tone. Start with a tuner. Then, add any EQ or compression. Next, include subtle modulation if desired. Finally, end with a reverb or delay for ambiance.